How to add images to a site?
There are four ways to add pictures to your pages: Image Elements, Slideshow Elements, Gallery Elements. We'll look at using all three types in this article.
Upload a single image - use the image element
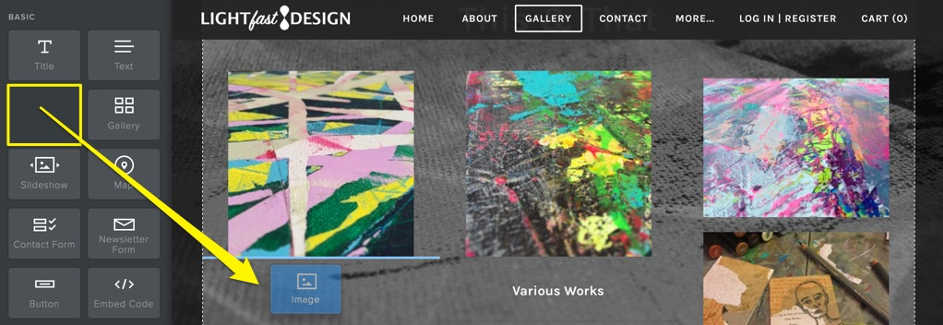
Select the image element
From the Build tab, drag the image element to a page. Then click on the element to open the image selection dialog box.
Upload an image file
Here you can upload an image from your computer by dragging the file from a folder directly onto this window or by clicking the green upload button and locating the file on your computer.
Adjust size
The size of the picture as it appears on your website may be a bit different than you expected, but you can change the size easily. Mouse over the image and a small blue box in the lower right corner will appear. Click and drag on this to resize the image

Adjust image settings
Clicking on a photo will bring up the element settings.
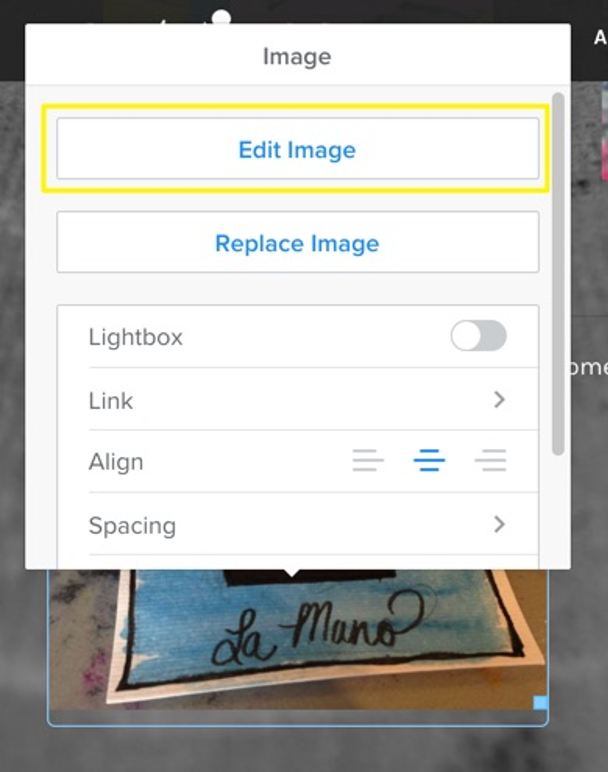
In addition to the Edit and Replace image buttons, the following options are available:
- Link: This option allows you to add a link to the image.
- Lightbox: Enabling the lightbox feature will display the full sized image in an overlay when someone clicks the image on the page.
- Spacing: Click on this to adjust the amount of white space around the picture.
- Caption: Click here to enter caption text that will display beneath the image.
- Advanced: This menu includes options to choose a border style and color and enter Alt Text for the image.
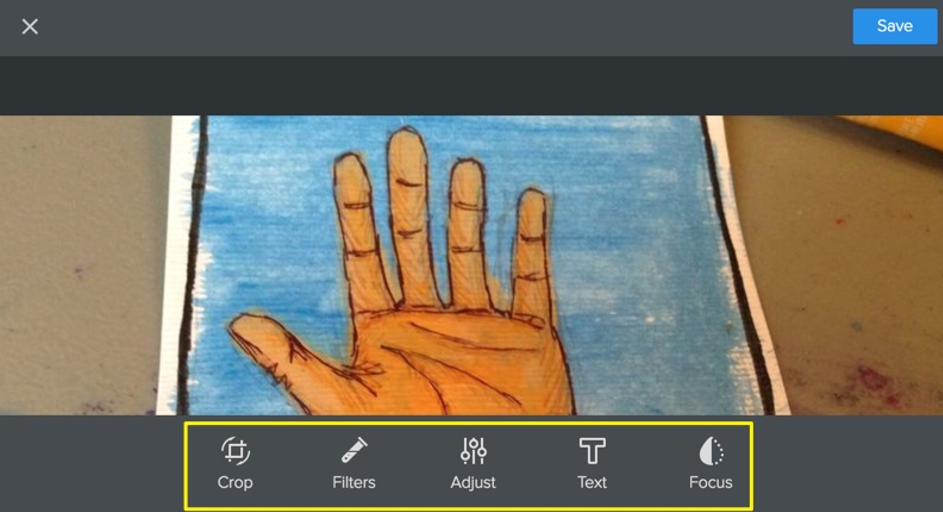
The Edit Image button will open an image editor with several more options. From left to right in the above image:
- Crop: Crop or rotate the image
- Filters: Add one of several filters, similar to what you may be familiar with from popular photo apps
- Adjust: Make adjustments to the image brightness, saturation, and contrast
- Text: Add text in a layer on top of the image
- Focus: Add a linear or radial blur effect to the image
Use the undo button to remove any change you don't like, and don't forget to click save when you're done editing.
Image aligned to text
You can also add an image directly to a text element and have the text wrap around the image. To do this, drag an image element into an existing text element.
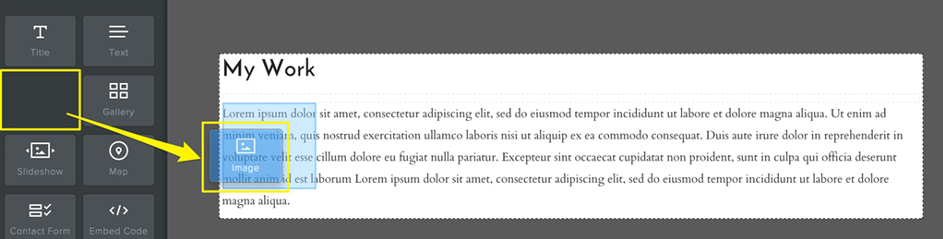
Then upload an image as described above. You'll likely want to adjust the size of larger images using the blue drag control in the corner of the image. You can access the same settings that are available for a standalone image element, like caption and spacing, and switch the alignment from left to right. Note that you can only place one image into a text element. If you want to create an magazine article style look, you can use multiple text elements and add a picture to each one.
To add multiple images - use Gallery or Slideshow
If you want to add multiple images to your site, there are two easy ways to do that: the gallery and slideshow elements. Which one should you use? It depends on how you want to display your images.
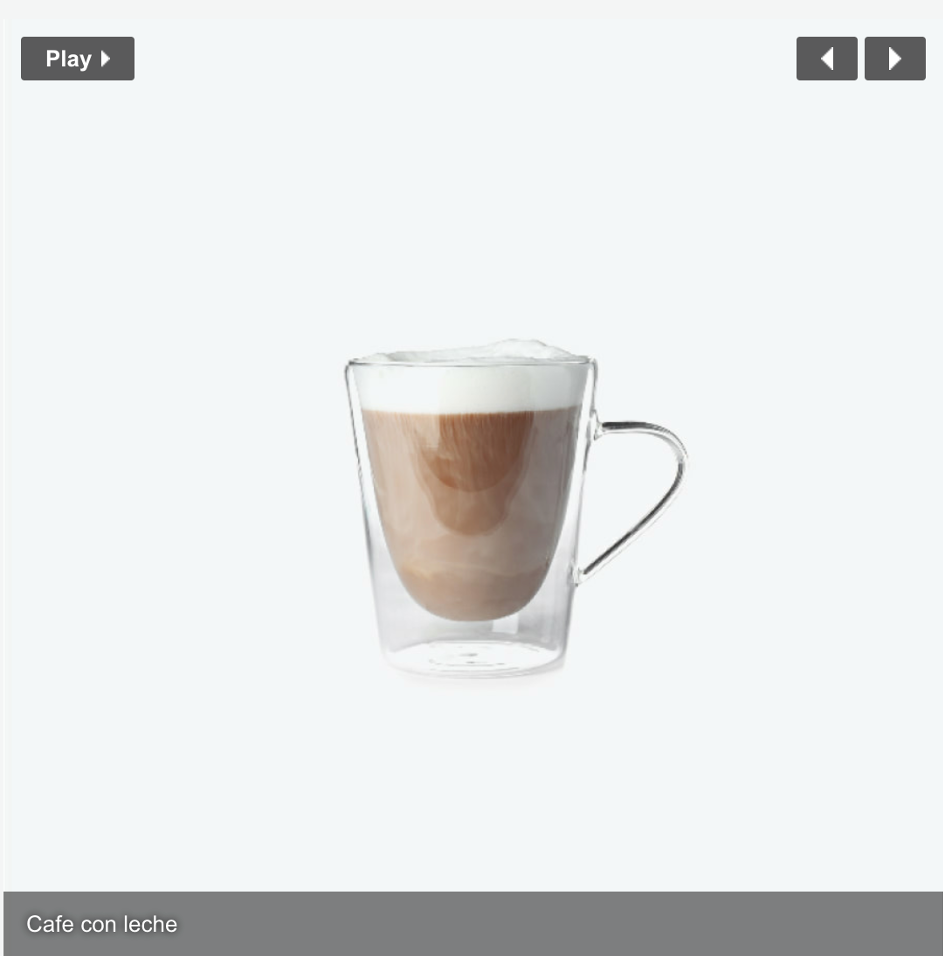
Slideshow: Displays a series of photos one at a time. You can set the slideshow to cycle through the images automatically, or allow visitors to click through the photos at their own pace. Each slide can have its own caption, link, and alt text.

Gallery: Displays a group of photos as thumbnails in a grid ranging from 2 to 6 columns wide. Clicking on a thumbnail opens the full image in “lightbox” display. You can add captions, alt text, and links to each thumbnail, though adding a link will remove the lightbox functionality from that image.
Add a Slideshow
To add a slideshow, drag the element to a page on your site. This will open a dialog box where there are several different navigation styles to choose from. Click on one of the styles to open the image upload window, but don’t worry, you can change the navigation style later! On the upload screen, click the button to locate and upload your images.
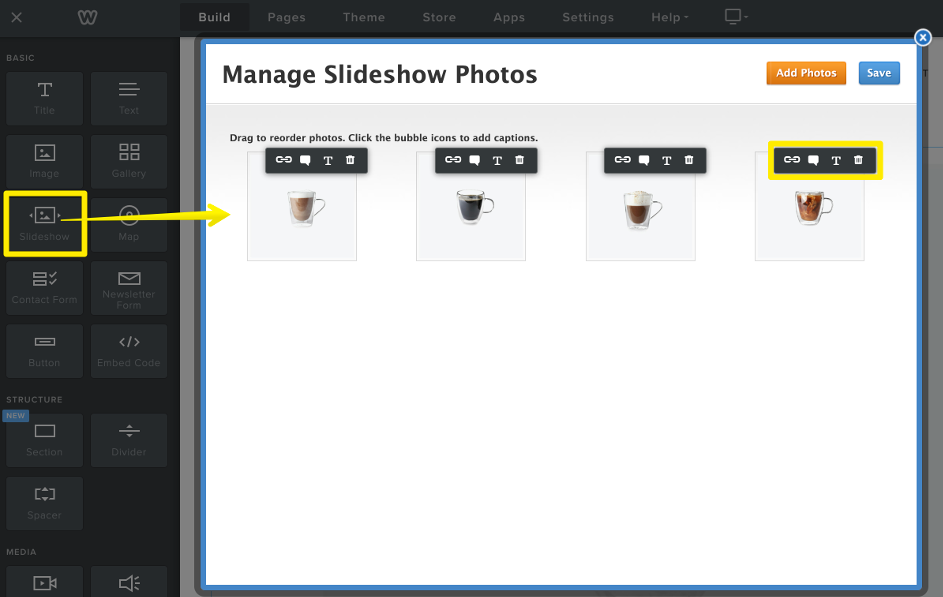
When your images finish uploading, you’ll be able to rearrange them and add text or links. To move an image, simply click and hold on the thumbnail, drag it to a new spot, and drop it into place. From left to right, the icons above each image allow you to:
Add a link to the slide Add a caption to the slide Add alt text to the image for accessibility Delete the photo from the slideshow
If you need to add more images, use the button at the upper right. When you’re done, click save to view your slideshow on the page and adjust the settings.
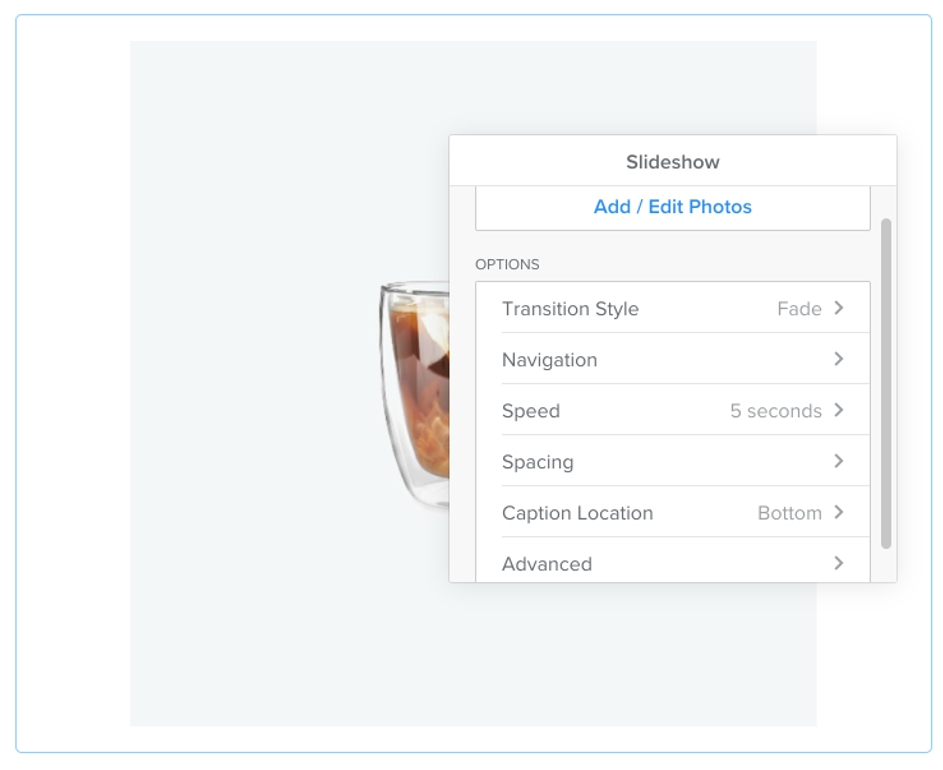
Click on the slideshow element to open the settings panel. The button at the top will take you back to the slideshow thumbnail screen where you can add and remove images and captions, alt text, or links.
The other options provide the following functions:
- Transition Style: Change the animation used when one image cycles to the next
- Navigation: Pick a different style of navigation for the slideshow.
- Note: “None” is the “simple” layout depicted in the images above.
- Speed: Decide how long each slide will display when using autoplay.
- Spacing: Set the top and bottom margins for the slideshow element.
- Caption Location: Switch the slide captions from top or bottom for all images.
- Advanced: Change the aspect ratio and autoplay settings.
Try out different options to see what works best for your purposes, and don’t forget to publish when you’re done!
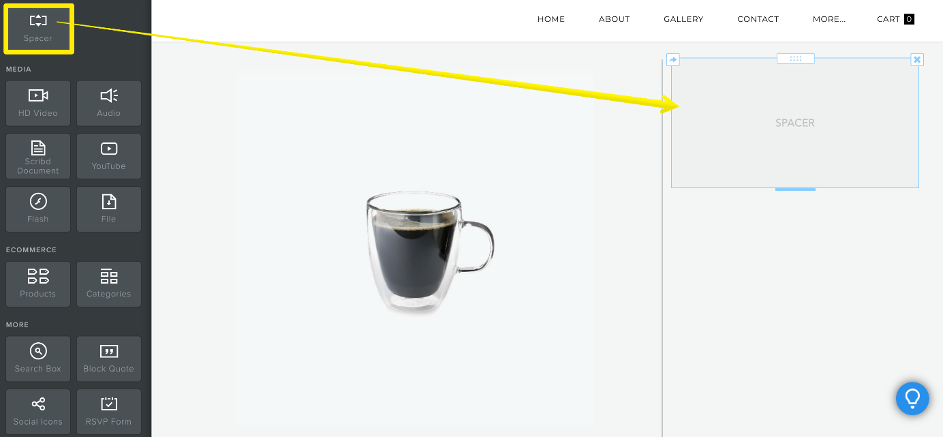
Note: The slideshow element will automatically expand to the width of the area in which you've placed it. If you want to make the slideshow narrower, you can put it into a column by dragging a Spacer element to either side of it. For more details, see the article on working with columns.
Add a Gallery
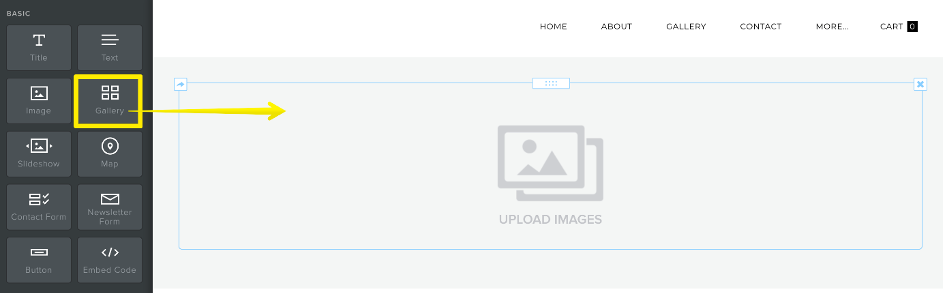
Drag the gallery element to a page and click to upload your images. You can select multiple images from your computer to add them all at once. When the images finish uploading, they’ll appear in the gallery on the page.
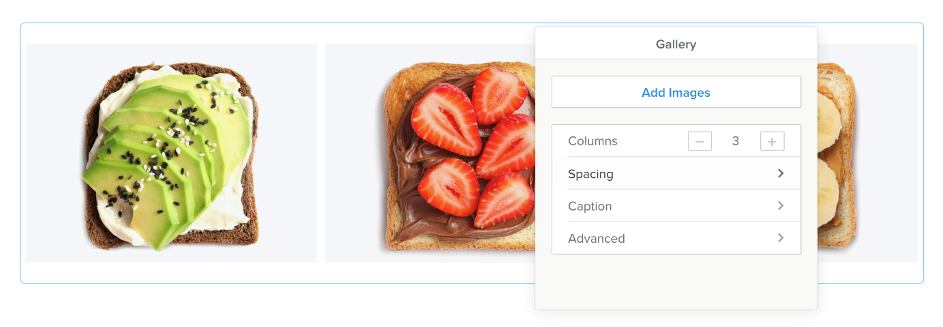
Click inside of the element to open the settings:
- Add Images: Upload more images to the gallery.
- Columns: Change the number of columns the gallery displays.
- Spacing: Adjust the top and bottom margins for the element.
- Caption: Choose a display style for captions (show only on the lightbox, show at the bottom of the thumbnail images, or show on top of the thumbnails in a translucent overlay) and turn on the option to display thumbnail captions only on hover.
- Advanced: Set the spacing between each image in the gallery and choose a border style.

Click on any image to add a link, caption, or alt text for accessibility. To rearrange images, click on a thumbnail and drag it to a new position. If you're displaying a lot of images, you may want to try using a larger number of columns - this will make the thumbnails smaller so more can fit into a row.
Note: Adding a link to a gallery thumbnail will prevent the lightbox from opening.
This article is not yet rated.
Login to give us feedback
Popular Questions
- How do I add a signature to my emails (webmail)?
- What is a SSL-Certificate?
- How do I change password for an email address?
- How do I create an email account?
- How to resolve issue with DNS?
- Why has there been a lot of weird characters added to my domain name?
- Why is my domain still regarded as "Available" after I have placed my order?
- How to set out of office auto responder?
- How to import DNS/forwarders data?
- What methods of payment do you accept?
